
Social Proof Notifications are the little pop up badges that appear in the lower left-hand corner of a website saying “Bill (Phoenix, Arizona) signed up for the free webinar”. Why do people use these social proof popups? Because they are a small, yet effective way to build trust quickly with strangers.
If someone shows up to your website for the very first time — has never heard of you — and is trying to decide “do I trust this person (or company) enough to give my email address?” and they see a little pop up that says Bill trusts this company it immediately lowers the objection level.
You may have other objections to navigate but at least you have one mark in your column for trust.
ProveSource is a great option for Social Proof Notifications because it allows you to trigger these notifications using webhooks and this short article will outline how to use their webhooks with your email marketing service (or whatever application you’re using to send data to ProveSource.
Video Showing How to Use ProveSource Webhooks with Drip
In the steps below you’ll see the step by step instructions. These instructions are pulled from this video which demonstrates how to use ProveSource webhooks with Drip email marketing. You can replace Drip with your email service and the merge fields your service utilizes. Here are instructions for webhooks for several of the most popular email marketing services. (As an aside another name for webhooks HTTP Post):
Here is a video showing how to use Webhooks or HTTP Post using Drip email marketing service.
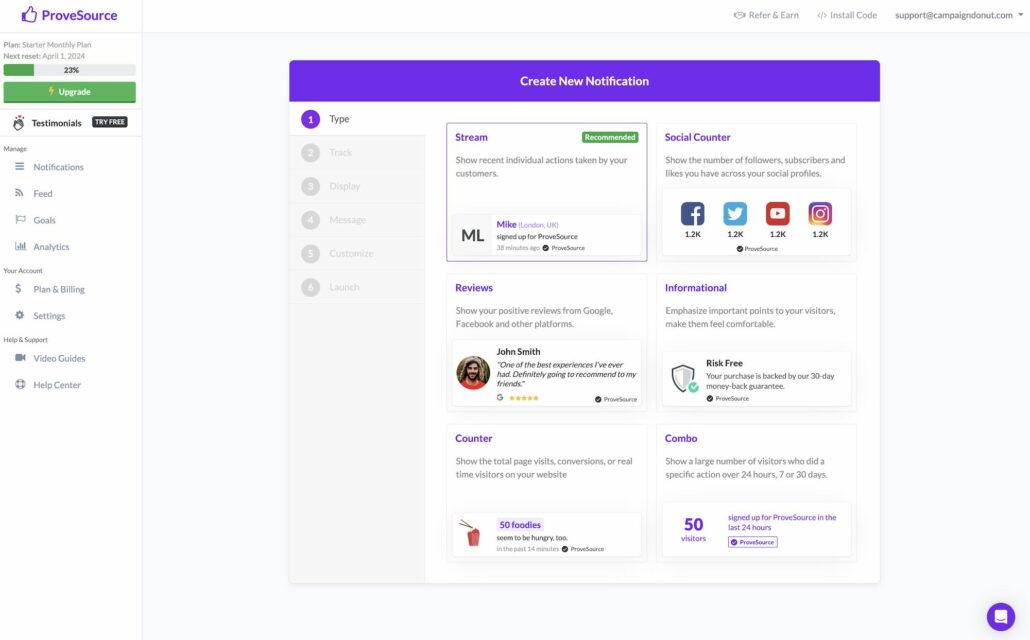
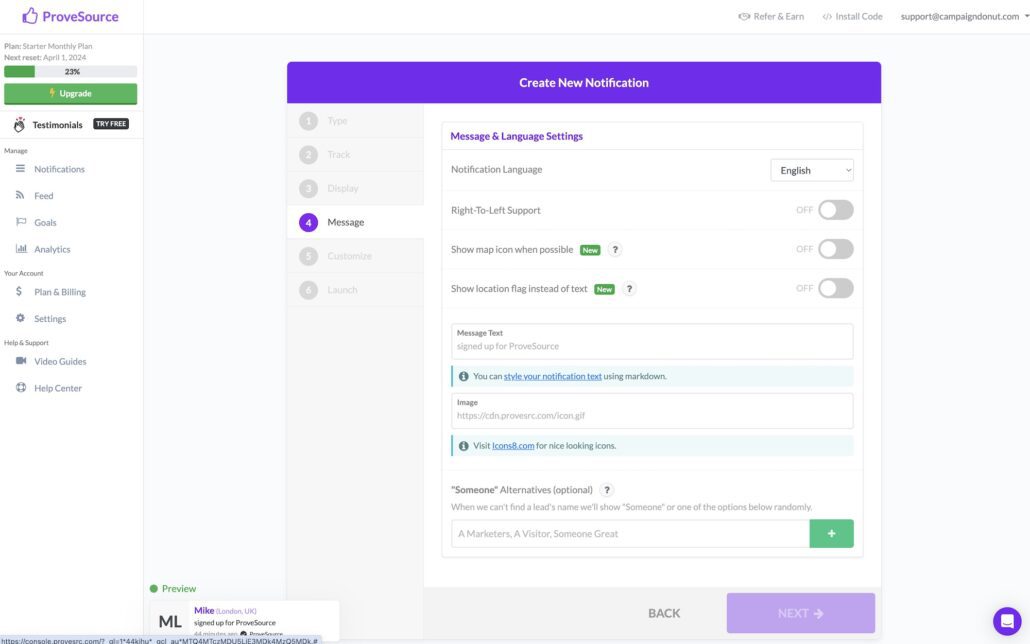
Create New Stream Notification In ProveSource
Once you have a ProveSource account you want to create a new Notification and select Stream. There are other options, but Stream is the notification is the option that will show who opted in.
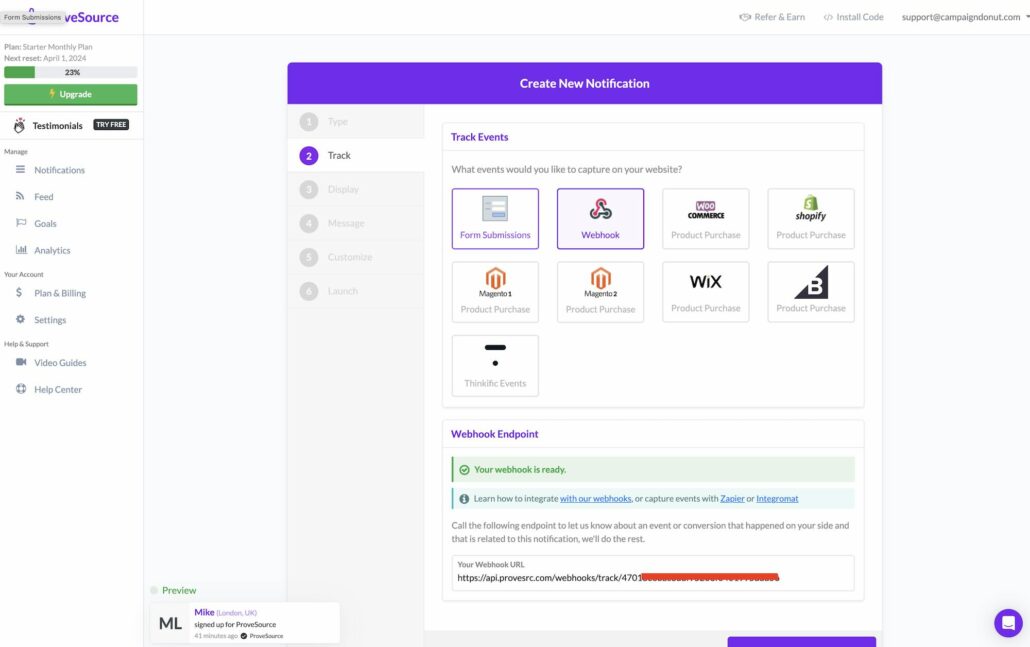
From the next screen you will select Webhook. Once you select webhook you’ll see the “Your Webhook URL” at the bottom of the page. This is the link you’re going to use from your email marketing service to send the subscriber information to ProveSource.
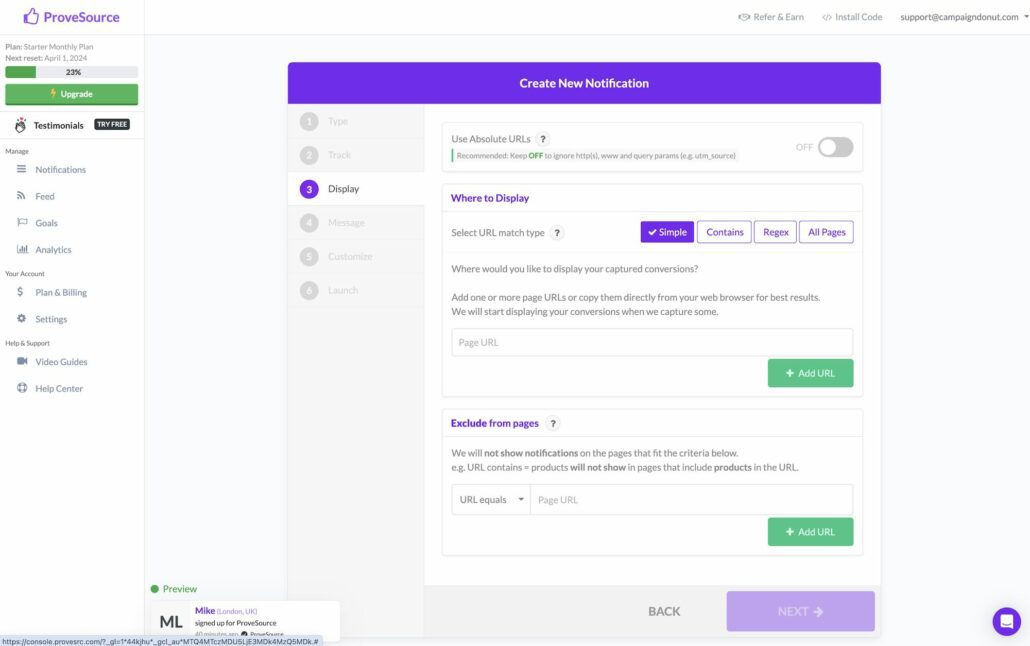
The next screen is where you configure where you want your notification to appear. All you need to do is paste the URL of the page you want the notification to appear on. There are other options (you can see Contains, Regex, and All Pages) and you can read up on how to use those from ProveSource help docs.
The following screen is where you can configure what you want your notification to say. If you want to use a custom image, you can, but you’ll need to provide the URL as there is no option to upload to ProveSource and store your files with ProveSource. I use Amazon AWS S3 to host my files or I reference the file located in my WordPress website.
Go ahead and progress through the remaining screens and click the Launch option on the final screen.
Configure Email Service for Webhook or HTTP Post
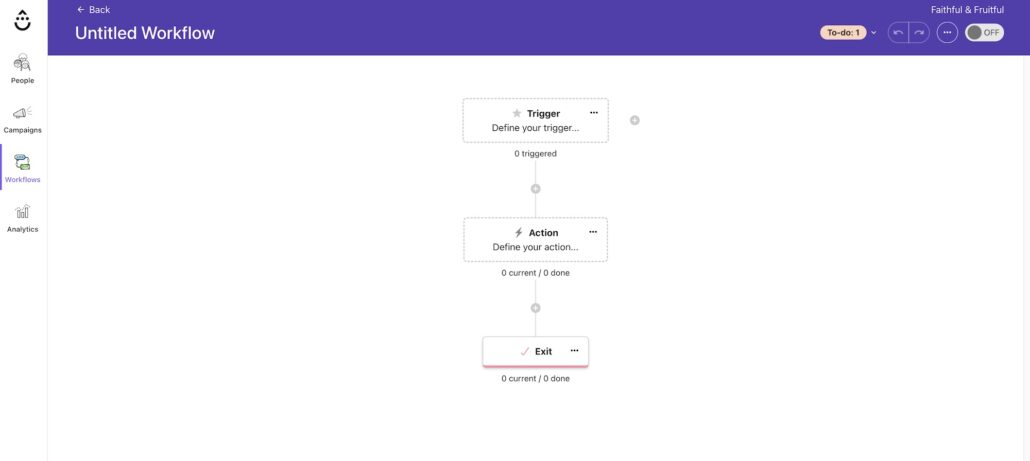
Because we’re using Drip we have the option to send a Webhook (HTTP POST) from either a Rule or a Workflow. For this example we’re going to use a Workflow.
Create a New Workflow From Scratch.

On the Workflow screen you’ll see the option to create a new action. “Action: Define your action…”
If you’re editing an existing workflow, click the + icon to add a new action.
Configuring the Drip action happens through a Popup Lightbox. When it says “What action should we perform? you want to select Drip (which is preselected) and then select the “Send an HTTP post” option.
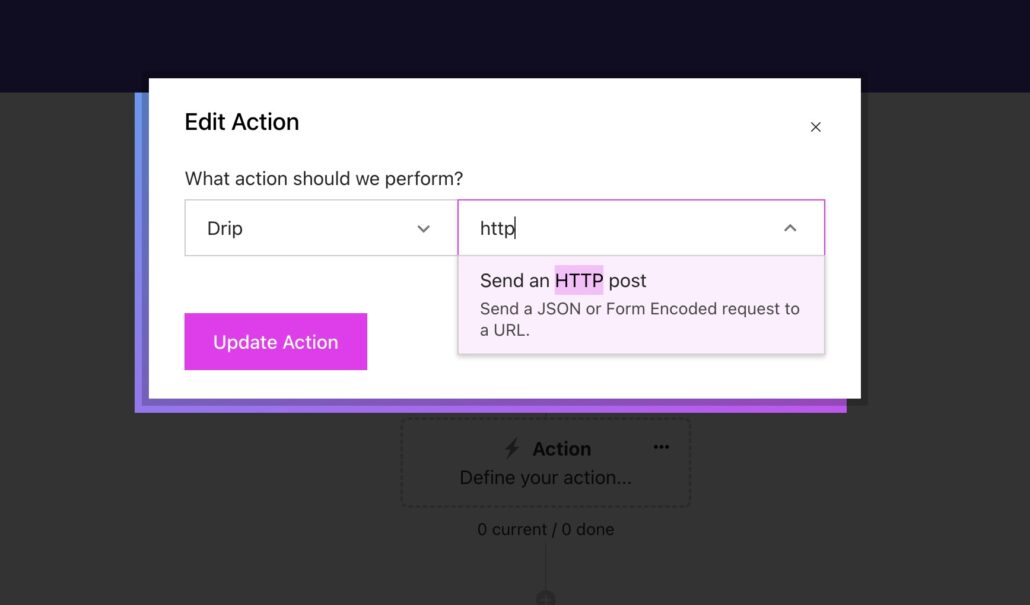
Once you select the HTTP Post option you’ll get a list of options that need to be configured. ProveSource makes this simple.
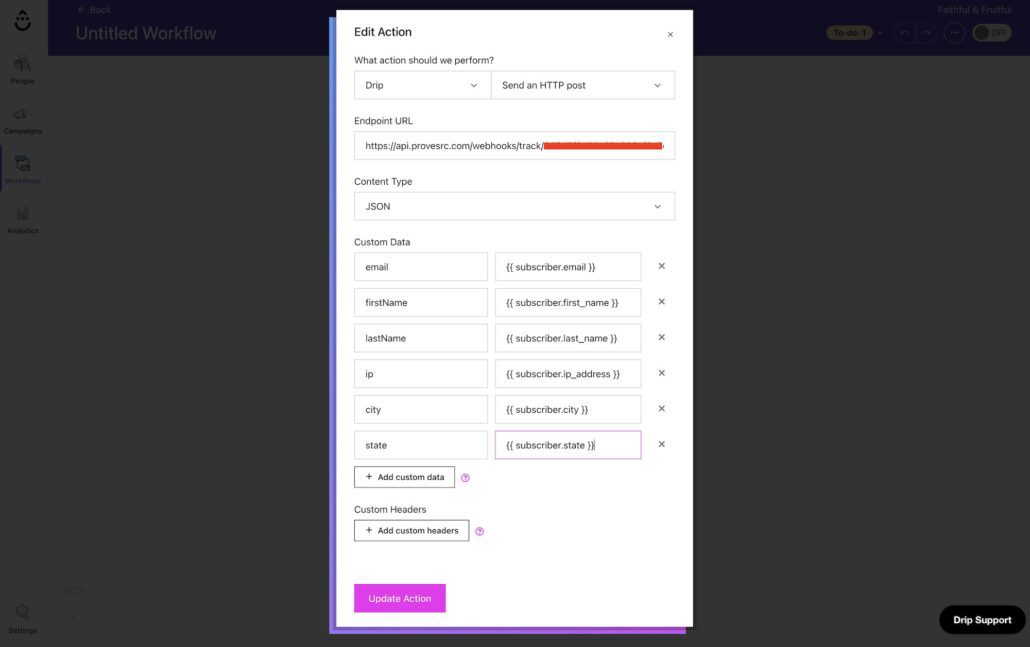
First, the Endpoint URL is the “Your Webhook URL” provided by ProveSource. Paste that link here.
You can take a look at the options in the screenshot below. In the Custom Data section there is a left column for the name of the value and a right column for the actual value.
Consult the ProveSource Custom Webhook for name options.
The right column is where you place the merge fields for Drip.
Here are the fields I use and the associated values:
- email / {{ subscriber.email }}
- firstName / {{ subscriber.first_name }}
- lastName / {{ subscriber.last_name }}
- ip / {{ subscriber.ip_address }}
- city / {{ subscriber.city }}
- state / {{ subscriber.state }}
Testing Data
One of the benefits of using webhooks and Drip allows you to push through whoever you want to the notification. If you have people who have previously signed up for the thing or purchased the thing you’re using the notification for, you can perform a bulk action and send them all to the HTTP Post.
ProveSource is very flexible and probably the best function for value cost available.
If you have any questions, leave a comment on the YouTube video and I’ll be happy to help however I can.
