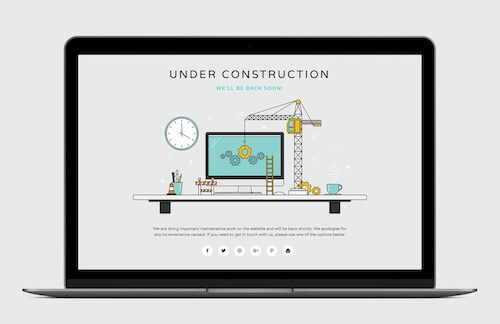
The moment a business owner makes the decision (or gives the go ahead) to create a new business website, or upgrade the site that’s been a ‘placeholder’ for the last 10 years, the first step is often to make a list of what the site will need before the launch. You start thinking through your products, your services, your staff, your contact information, your social media, and more. Now that you’re on board with the idea of investing in a strong online presence, the last thing you really want is a page that says, “Under Construction.” The good news is that the days of the flashing red lights and the yellow and black road barrier illustrations are gone.
In this post you will discover how to make a splash page website and why it is the best option for many business leaders who want to immediately begin reaping the rewards that come with caring about how your business is perceived online.
Everything You Want Live On Your Website at Launch
Going back to the list you’ve made, you will probably want your new site to launch with a combination of the following:
- About our company page
- Contact information page
- Home page (duh)
- 5-10 blog entries (for SEO, right?)
- A well done welcome video
- Products or services page (obviously)
In years past, the process for creating a temporary website to serve as a quality placeholder while you build the full scale would have both been the same. The cost might have been a bit lower for the temporary website, but the process of working with a web company to bring that temporary site online would have been very close to the same.
Long gone are the days of having to make the choice of launching a full scale web design project or attempting to build your own website using Geo Cities. Today there is a simple solution known as a splash page website and gives you the ability to create a simple, one-page website with all the essential information so you can be useful to customers right away as well as providing search engines content to begin scraping and serving up in their search results.
How to Make A Splash Page
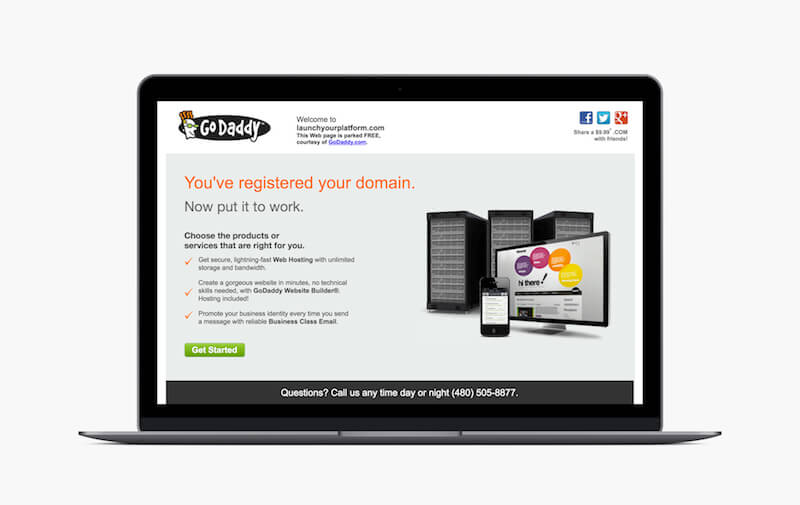
So what is a splash page website? A splash page website is essentially a single page website that contains the most basic information about your business or brand. Rather than your website visitors being met with a “this site will be live soon” construction page (or a domain holding page like the GoDaddy example below), visitors will have access to the essential details of your business, allowing them to confirm you are a real entity and provide them with what they need in order to contact you about your products or services.
How to start a splash page website comes down to adding the following content to one single page:
- Your name
- Your business name
- A subtitle of what you do
- Your logo (if you have one)
- Your physical address (if you have one)
- Your mailing address (if necessary)
- Your email address or contact form
- A photo of you, your business building or your team
- A brief statement about what you do
That’s it. A well planned, well designed splash page at your domain URL you can begin sending clients, leads and visitors to your website knowing that they will discover an accurate picture of who you are, what you do, how you help people and how they can work with you.
Business owners are asked all the time, “What’s your website?” they’ll respond with something along the lines of, “well, I will be able to make it live once I finish writing several blogs, record our welcome video, have professional headshots taken and list all our products and services.”
Accomplishing all this “stuff” can take four to six months to accomplish – not because it should but because that’s just what happens. In some cases, it will take years. Or worse, never launch.
If you want to see an example of a website that launched relatively quickly, you can look at Blue Fox Branding. Their website is relatively small, however, the time and effort put into doing the strategy and design right put the launch of the site at 120 days. A new company like BFB couldn’t afford to wait 120 days to start sharing their website. Most businesses can’t.
When you decide to create a splash page website for your business, you get ahead of the competition still waiting for things to be in place.
The Website Launch Heard Around the World
You might be wondering if splash page websites are so great, why haven’t you heard of the concept more?
Splash pages aren’t as widely used as they should be. In our experience clients will often have what our team calls a “website launch heard around the world” mentality. This essentially means that there is a belief that as soon as you click a big “GO LIVE” button, thousands of visitors will immediately bombard your website, clamoring for the content you’ve created.
This is rarely the case – and by rarely, we mean RARELY. However, let’s just pretend that this is how it happens… just for the sake of my next point.
If you believe that hundreds of visitors every day, thousands every week, will come to your site as soon as you launch, you wouldn’t be able to handle the traffic.
Why?
Because you’ve probably skimped on a decent web hosting plan. You probably have tried to find the cheapest hosting plan available and are paying something like $4 a month to share a server with 998 other websites. If your site launched to thousands of visitors, your host would be crippled, providing slow load times and driving people away by the hundreds.
See this post on selecting a web server on my personal blog.
Or, let’s take another angle. Let’s say that you click “GO LIVE” and thousands of visitors in one month come to visit. If that were the case, why wouldn’t you launch your site sooner with a splash page? Wouldn’t you want to capitalize on the weeks or months of traffic with a splash page website rather than waiting for a full scale launch?
Back to reality – your site will not launch to thousands. It won’t launch to hundreds. Chances are there is a completely different launch scenario that you haven’t considered but is more realistic for you.
The Real Story of How Your Website Will Launch
You are excited about the launch of your new website, and you should be. Your employees and teammates are probably excited too, and they should be.
But outside of your company, very few people are waiting for your website to launch. Unless you ran a successful marketing campaign or a crowdfunding campaign (see the Coolest cooler) and your new fans are eager to learn more about you and your company, you won’t have a significant source of traffic for when your site launches.
You are brand new to the online marketplace – even if you’ve had a website in the past, you’re just now getting serious about utilizing the online space. You may be a brick-and-mortar marketplace, maybe even going on decades of business, but to the online world, you are new.
When you launch your new website it’s most likely that each of the following will be true:
- People who have caught wind of your name, through referrals and recommendations, will find your website when they search your name.
- In your next email to clients, you’ll announce that your business has a new website and 10-18% of those who open your message will visit your site for a few seconds.
- You will share your new website with friends, family, colleagues and on social media, giving you a few dozen, maybe even a couple hundred visits in the first month.
That’s it. That’s the reality of what a business website launch looks like in the modern day when done without a major launch campaign behind it.
How to Incorporate Blog Entries Into a Splash Page Website Launch
Perhaps now that you are more acquainted with the idea of a splash page website, you’re on board with the idea but you really need to launch with a few blog posts and maybe some additional content… not a problem at all.
If you must launch with blog posts, then you want at least one post to cover each topic you will discuss on your website – or one for each product/service. The concept of one blog post for each product or service provides enough strategic direction for your company blog without overcomplicating the process of launching a splash page website.
In fact, the first site for Shrein Media was a single page where we focused a few blog posts on web, social media, and email marketing.

You will be able to write additional blog posts in the future, but for your splash page website you want to focus on only the most essential posts and place the rest of your attention on launching your full-scale website!
How to Actually Create a Splash Page Website
So let’s talk about the practical steps now for how to launch a splash page website.
First and foremost, you need to pick your website builder. What builder are you going to use? Here are a few options:
- WordPress (we’ll cover steps in launching via WordPress below)
- Squarespace (our recommendation if you’re not going to use WordPress and the company developing your full-scale website isn’t going to build a splash page for you).
- Wix
- Weebly
- WordPress.com
If you are using a website builder such as Squarespace or something similar, they will have sample splash page templates that you can access. There are other services out there, and the reason why Squarespace would be elevated above the others is because it gives you less control over look. You want a professional look and unless you’re a web designer or graphic designer, you want a template that has already been developed for you where you can fill in the blanks.
If you’re like most online businesses, you’ll want to use WordPress because of it’s flexibility, ease of use and overall feature set (through plugins and themes). When our team builds out a splash page for a client like Pilates by Jean we will publish the splash page using WordPress and work on the complete site behind the scenes of that WordPress site. In the case of PBJ specifically, we actually published individual pages as they were ready and link to them from the splash page.
If you’re ready to give a go at creating your own splash page website using WordPress, here are the very basic steps for you to follow in order to publish your splash page website this week.
Step 1: Secure Web hosting
If you have not yet secured web hosting, that is where you will want to start. I have put together a post here on my personal website that will help you navigate selecting a host that suits you.
At Shrein Media, we have begun recommending WPEngine for a ‘host’ of reasons.
- Amazing support for customers through 24/7 live chat
- Great administrator tools for managing site performance
- Fast servers and SSD hosting equipment
- High performance caching
- Built in content delivery network (CDN)
- Oh, and one more time, their AMAZING support
WP is a professional solution. You will be able to find cheaper hosting and though cheap hosting can sometimes work out, our approach is that a professional website deserves professional hosting to produce a professional experience.
You can learn more about WPEngine using our affiliation link here and save 20% off your first payment.
Step 2: Install WordPress
WordPress can be installed in one of two ways: manually and through an install script.
Manual installation will require you to create a MySQL database and user – super easy but I know that even looking at the letters “MySQL” can be intimidating to any business owner. If you’re interested in knowing how to install WordPress manually, you can watch this video which does a decent job of explaining the process.
Most web providers, including WPEngine which installs WordPress for you on the moment of account creation, will have script installers that allow you to install WordPress on your server with one click. This is going to be the preferred method of installation for most people.
The ONLY downside is that typically web hosts will have deals with other businesses and when you install WordPress, a few plugins may install as well. For instance, one provider I was using was installing Mojo Themes with every new WordPress plugin. This is very similar to buying a new PC and upon starting for the first time there is a ton of “bloatware” installed that you never wanted in the first place.

All that said, there is nothing wrong with installing via script.
Step 3: Purchase A Website Theme
In the past you might have tried to go the ‘free route’ but now that you’re serious about expanding your income sources to the internet you do not want to use a free theme. Free themes will typically put your site at security risk, are not well maintained, not often updated, and you will not find any support when you get stuck.
At the time of this writing, Shrein Media exclusively uses the Enfold Theme by Kriesi to implement every online business strategy we draft for our clients. You can use any theme you want but for a splash page website to be an option you want a theme that offers you the ability to hide sidebars, main navigation, footers, leaving only the main body content. Using the Enfold Theme, you can select a template that does this very thing.
If this is already sounding too complicated but you do want to explore a splash page website, we would be happy to talk and see if working together would be a fit. You can submit a ‘Get Started’ request here to get the conversation started.
Along with recommending the Enfold Theme specifically, I also recommend using a theme that has a drag-and-drop editor, as Enfold does. Another theme that many love for this same reason is Divi Theme by Nick Roach and the folks at Elegant Themes. You can learn more about Divi and Elegant themes using our affiliation link here.
Both Divi and Enfold are fantastic themes. The important thing is that you get a theme which allows you to achieve the look you want through a simple, easy to use interface.
Step 4: Select Colors for Your Business or Brand
If you’re brand new to online business, or business in general, chances are you don’t yet have a logo or a color palette. While you can get more “official” in the future, the goal here is to be as quick as possible. You will want to select a temporary color palette to use for your splash page website; if you want to change it in the future, you can.
Adobe provides one of the best color resources on the web appropriately titled Adobe Color CC. You can easily create a palette of complimentary colors based upon a single color you have a taste for, or you can use their explore tab to search thousands of palettes that others have created and uploaded to Adobe.
I have used the explore tab more than once to provide a nice palette for clients; you should be able to find something that you’ll really like using either one of these features.
One other website that does a similar function to Adobe Color CC is Coolors.co. It’s a very straight forward color palette service that allows you to select a combination of five colors. It’s worth a look.
Step 5: Design Your Splash Page Website
Designing your splash page doesn’t need to be hard. Why? Because there are so many examples on the web that you can follow. Here are a few examples you can begin with, then if you need more, I’d encourage you to click here for more options.
- Media Loot App Splash Page Template
- Enfold Theme Splash Page
- Divi Theme Splash Page
- SchoolDesk Splash Page
- K Belanger Law Splash Page
- Blue Fox Branding Splash Page
- Pilates by Jean Splash Page
As I mentioned before, don’t forget to include the following content on your splash page website.
- Your name
- Your business name
- A subtitle of what you do
- Your logo (if you have one)
- Your physical address (if you have one)
- Your mailing address (if necessary)
- Your email address or contact form
- A photo of you, your business building or your team
- A brief statement about what you do
There is a lot you can do for a splash page. The bottom line is that you want your splash page website to be simple, communicative and reflective of your business or brand.
Step 6: Get a Second Opinion
You’re not a website expert. You never wanted to be. You are only doing this because it is a necessity to launch your online business.
No matter how much you like (or dislike) what you create, you want to get a second opinion. Good web design is not about preference but rather art and science. There are people who spend their entire lives dedicated to understanding the art of the human brain and how it interacts with design experiences.
You will benefit greatly from getting several eyes on your splash page. You want to ask folks who will be honest with you and are on your team. People who want you to succeed at your work and who will tell you the truth versus affirm what you’ve done.
Never Wait for Your Website
As helpful as a website will be in attracting clients and securing work, it is a tool, it is not a substitute for good business and a solid sales process. The belief that a website will do all the hard work and you can sit back and do nothing once it’s live, is a false belief that will leave you with very little to show for the time and money you invest in a site.
If you ever find yourself saying something like, “once my website goes live, then I can start making sales,” it probably means you have unreal expectations for your site. and you’ll be left disappointed.
There are, of course, exceptions. If you’re selling a product and taking sales through your website, yes, you need to have a website. Using a splash page website, you can sign up for a simple tool like SendOwl (learn more about SendOwl here using our affiliation link) to facilitate the sale of your product online until your full website is done.
Online business is an all hands on deck effort, and your website will work in harmony with your social media, email marketing and in-person sales processes. Even if one is down – i.e., you’re finishing your website – you need to keep the others running so you can continue to grow your business, brand and authority.