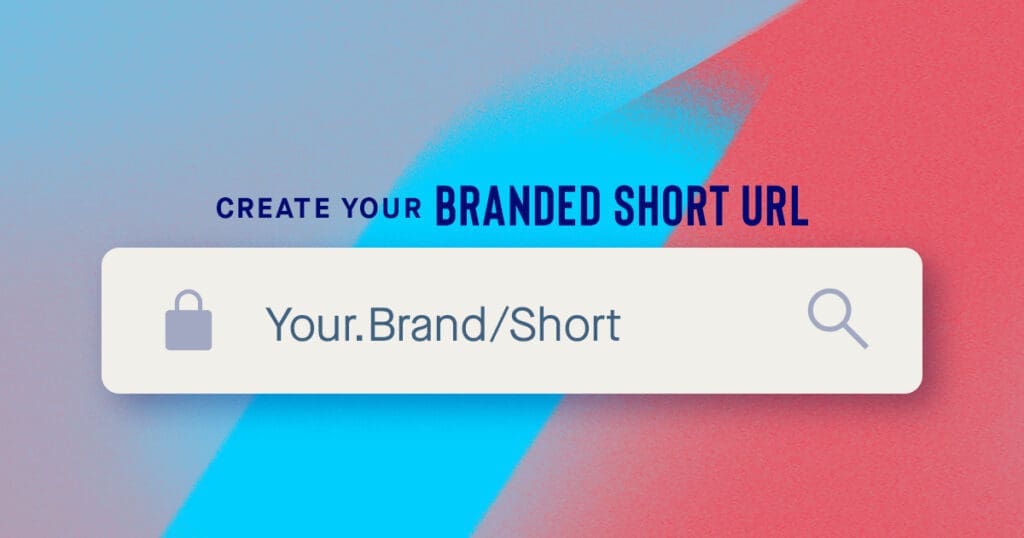

“How do I get a cool custom short URL like I see other brands using on social media?”
Something you don’t pay attention to when you first start sharing your content on social media is the actual length of the URLs you are including. As time goes by, you become more aware of how important presentation (uh hem, branding) is and start taking notice of how ugly your URLs actually are.
They are not pretty. They are too long. What can I do about this?
Once it is on your radar you start noticing that other users are sharing links but they are coming from bit.ly or buff.ly or rebrand.ly. The tools that create these pretty links are called URL shorteners — and they do exactly that, shorten the URL.
And Then You See A Short URL That Is Custom
Among all the generic links that come from these URL shorteners, you will notice that some users have unique URL shorteners that appear as if it were made just for them.
And you’d be right — these are called custom short URLs or a branded short URL.
In this article we will take you through the steps necessary to setup your own custom short URL using a service called Bitly. We’ll use pictures and specific instructions for every step in the process and when we’re done you will have your very own custom URL.
Who Is Using A Custom Short URL
Years ago I spotted my first custom short URL. It was from Michael Hyatt. I actually thought it was so cool I took a screenshot. I immediately wanted one.
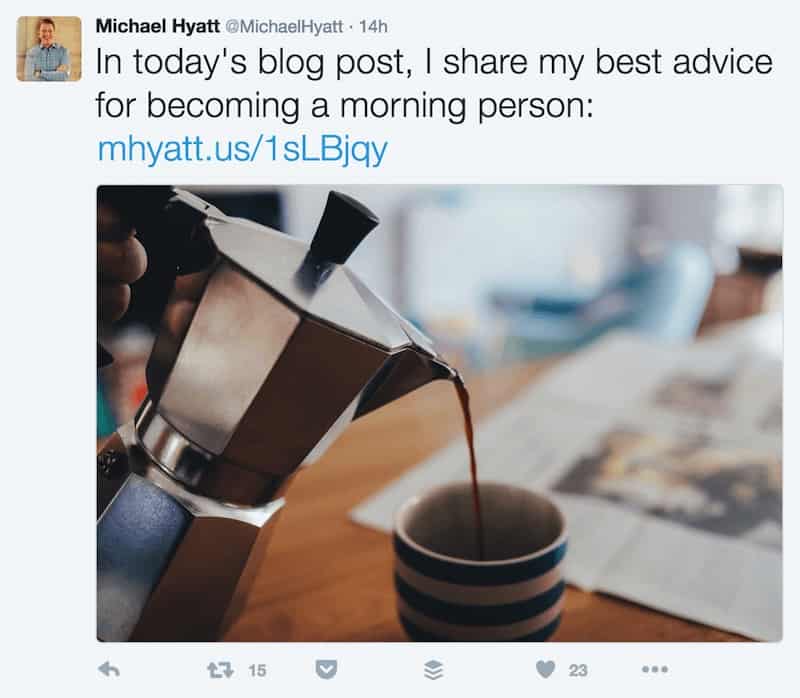
Hyatt has been a mega-blogger for years initially I thought, “that’s probably something only the ‘big guys’ have access to.”
Shortly thereafter I noticed that Buffer had their own. I took a screenshot of their Tweet, too.

Seeing two brands using their own branded short URL, I started to scroll through my feed looking for other brands using a custom short URL. Once I started looking, they were everywhere!
After a little bit of research I discovered that anyone, in fact, could have their own branded short URL, including you!
Beyond the visual appeal, there are a lot of features custom short URLs offer which can enhance your overall marketing efforts — not just your brand appearance. Dustin Stout has a great breakdown on custom short URL benefits along with a very in depth tutorial on maximizing Rebrandly.
Selecting Your Desired Custom Short URL
When you’re choosing a domain for your primary website it is always preferred to find a .com or .net address. When choosing a domain for your custom short URL, it really doesn’t matter what domain extension you use. The only preference is to find one that’s short. An extension with 2-3 letters is preferable.
Visit a domain registrar (in this example we’re using GoDaddy) and start searching for the domain you want to use.

As you scroll through all the options and recommendations, you are looking for a domain similar to your brand but shorter. For example, Michael Hyatt’s website is michaelhyatt.com and his branded URL is mhyatt.us.
When setting up Campaign Donut’s URL, we went through dozens of options and even more searches. Many of the domains we wanted were already taken. We eventually settled on the domain campy.pro, a nod to the first name we ever had for Campaign Donut.
Find a short URL that you’re comfortable with and buy it.

Once you have purchased your new domain, it is time to integrate the domain with a URL shortening service.
Select A URL Shortening Service
Today, you have more choices than ever when it comes to selecting a service to hand your URL shortening. Here are five URL shortening services that give you the ability to create your own branded URL:
There are two things you want to look at before choosing your service:
- Will the plan I choose meet my needs.
- Will this service integrate with the tools I already use.
At Campaign Donut, we chose Bitly because of the second need — it was the only option that had a native integration with several key services we use.
Third-party integration tools like Zapier can help you get around the lack of native integration with some tools — others, you’ll want native integration.
How to Setup Bitly Custom Domain, Step-by-Step
Bitly has been around for a long time (in URL shortening service years) and offers a limited free option for a custom branded url.
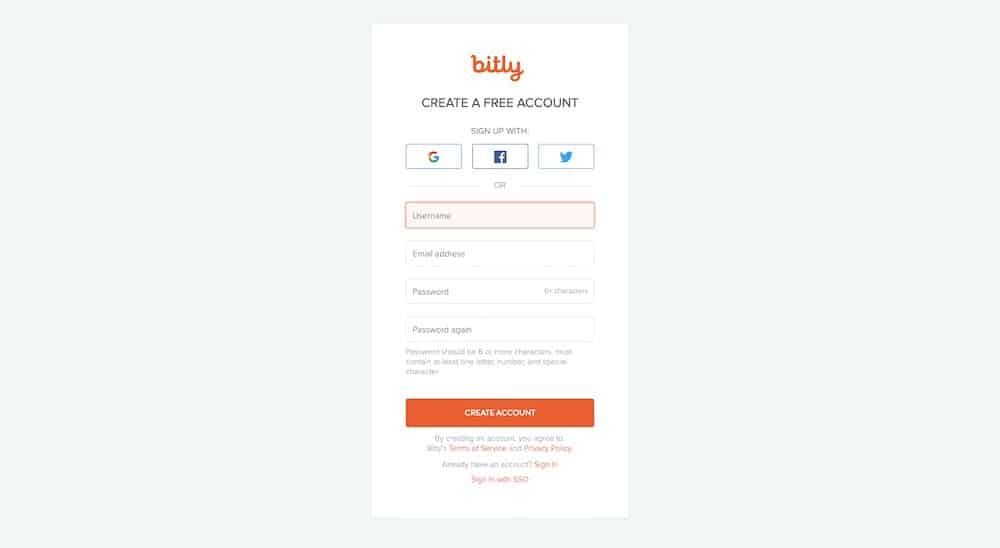
If you already have a Bitly account, go ahead and log in as usual.
If you do not have a Bitly account, you can sign up for free and then proceed to complete the steps to connecting your custom branded URL.
Once you are logged into your Bitly account select the account details button from the upper right hand corner to reveal account details sidebar menu.

From the account preferences menu, click on the ‘Manage’ text to reveal the Account Details option. Click on the ‘Custom Domains’ tab. Click on the ‘Add Custom Domain’ button from the upper right hand corner.
The ‘Add Domain’ menu will appear and you’ll now receive instructions from Bitly on how to update your domain’s DNS to connect Bitly to the domain itself. The two records you will need to create are:
- A record = 67.199.248.12
- A record = 67.199.248.13
(The records Bitly provides you may be different than the records we were provided in this example.)
In the white box at the bottom, ‘Custom Domain’, type in the domain you purchased. Do not click verify just yet — proceed to the next step below.
Update Your Godaddy DNS Records
Keeping the Bitly ‘Add Domain’ window open, return to your domain registrar (we used Godaddy) and access the domain DNS records.
Delete any current A records and then add the two A records as shared in the Bitly instructions, saving each.
The instructions from Bitly assume you are using a domain that is not currently in use. For instance, we would not update ‘campaigndonut.com’ to be our short URL because it is already in use. We purchased a new domain to serve as our short URL domain. If you would like to make changes to a domain currently being used to any extent, make sure you know what you’re doing before you make changes.

After deleting any previous A records and adding the two Bitly URLs, it may take a few moments for the new settings to take effect. Still, you can proceed to the next step.
Verify Your Bitly A Records
Return to the Bitly ‘Account Details’ page and click Verify. If Bitly cannot verify the records right away, wait a few minutes and try again. It may take up to 30 minutes for all settings to populate across the internet in order for Bitly to see you’ve updated your A records.
In some cases it may take a domain registrar up to 24 hours to propagate the DNS record adjustments across the internet.

Once verified, refresh your browser and navigate back to the Menu>Settings>Advanced Settings section. Confirm that your new domain is the default domain for your shortened links.

When you are able to select your newly configured domain as the default domain for Bitly, that indicates you have successfully setup your custom short URL. You can now begin using Bitly to shorten your URLs with that domain.
Using Your New Bitly Custom Short URL
When you’re ready to create your first link, return to the Bitly dashboard and click the ‘Create Bitlink’ button.

The Bitlink meny will slide in to view on the right side of the screen to reveal the ‘Paste Long URL’ option. Once you paste your URL, in a matter of milliseconds, Bitly will automatically create the link. If for some reason Bitly doesn’t automatically create the link, press the ‘Create’ button at the bottom of the screen.
The Bitlink menu slides in from the right (on desktop) to reveal the “Paste Your Long URL” field. Paste your link there and either click the Create button at the bottom or wait approximately 3 seconds and bit.ly creates the link for you.
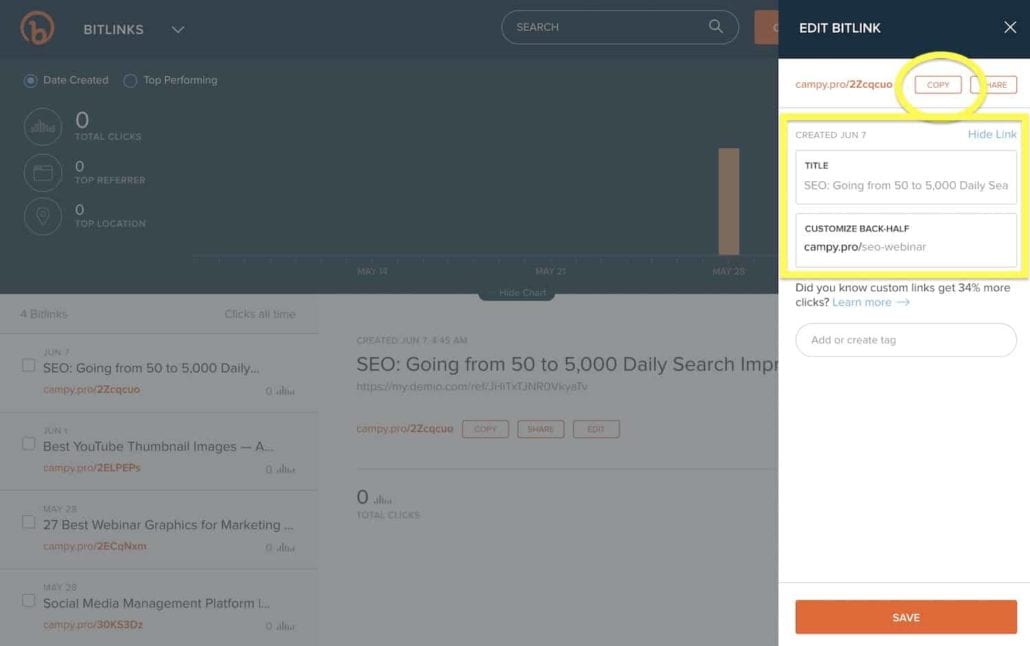
After creating the new Bitly, you have several options in the updated sidebar window.

- Copy: Click the copy button to copy the new custom short URL to your clipboard. You can proceed to paste the link whenever you wish.
- Share: Bitly has built in configuration with Twitter and Facebook. You can connect your social accounts to share directly from Bitly.
- Title: Using the title field you can customize the title that will appear when sharing on social networks or anywhere preview snippets populate.
- Customize Back-Half: This option allows you to change the preassigned Bitly URL. Bitly assigns a string of random letters and numbers and Customize Back-Half allows you to change that with something more intelligible.
What If I Run Out of Branded Links?
You might be wondering, “Is there any reason for me to use a bit.ly link rather than my custom short URL?”
In the past, Bitly allowed you up to 500 branded URLs per month. Currently, the free plan allows you only 50 custom domain URLs and 1,000 shortened URLs total. If you’d like more URLs, you can upgrade to one of Bitly’s paid plans, starting at $29 per month.
Another service we recommended above, Rebrandly, provides a much more generous free plan with 500 custom domain URLs and up to 5,000 trackable shortened URLs. Unfortunately, Rebrandly doesn’t integrate with some of the services we use — hopefully you’ll have more luck.
When You Should Use A Branded URL vs Standard URL
With a limited number of branded URLs available, you may be wondering if you should still use a bit.ly domain. Here are two suggested use cases where you may consider the bit.ly domain.
- You use your account to create a short URL for a friend, family, or a customer and do not want it to carry your branding.
- You want to shorten and track a URL that is not associated with your business brand.
Otherwise, it is the best practice to use your branded URL for your business. It looks professional, it is consistent with your overall brand, and it will be an eye-catching URL when shared outside of people in your network.
No longer will you be the one noticing the fancy short URLs all the ‘big guys’ are using. As small is a custom short URL may seem, it will have a big impact on how people view your brand on social media, especially if it is just one part of a strong brand you are working hard to develop.
Final Thoughts On Creating Your Own Branded URL
If you have any question about using Bitly to host your custom short URLs, choosing at domain to use for shortening URLs, or applications for your short URL, send us a message or leave a comment below. We want to be helpful and make sure you keep out of the marketing muck to keep moving forward and convert like crazy! If we can help, we will.